We recently took part in a very useful and well-attended meeting of the East Midlands Learning Technology group that discussed the use of Microsoft Office365 in teaching. This included a review of the accessibility features built-in to Windows 10 and Office365. I’ve selected a few of these that might be useful to share more widely.
Immersive Reader
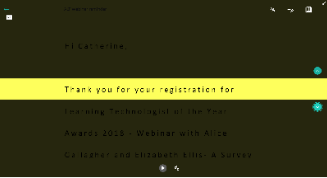
The Immersive Rea der is a tool to improve reading comprehension. It’s particularly useful for readers of other languages or students with learning difficulties such as dyslexia, however it could benefit anyone who needs help focusing when reading text on screen. There is a ‘Line Focus’ feature, so that only the current line or paragraph are highlighted, as well as the option to have the text read aloud. It also enables you to change text size, spacing and background colour and highlight syllables or certain parts of speech.
The Immersive reader is available in OneNote (online and app versions), Word online, Outlook online and Teams. For example, in Word online, there is an Immersive Reader option on the View tab.
![]()
In Outlook online, select a message, click the three dots at the top of the page and choose Show in immersive reader.
Narrator
Windows 10 and Office365 has a built-in screen reader called Narrator. This is designed for people with visual impairments, but is also useful for students (or staff) with dyslexia or other learning difficulties. One suggestion during the meeting was to use it to help proof-read your work.
There are a few ways to start and stop Narrator, for example:
- Press the Windows key + Ctrl + Enter
- Press the Windows key + U together, then choose Narrator on the left.
- Press the Start key, then go to Settings (the cog on the left), choose Ease of Access and Narrator is on the left.
Magnifier
You can use the Magnifier to enlarge all or part of your screen. For example, when teaching you could enlarge the part of the screen you are describing.
To start the magnifier, press the Windows key and the + key together (or Windows + U then choose Magnifier on the left). You can then use Windows and + to zoom in or Windows and – to zoom out. Choose Views > Full Screen to enlarge the whole screen, or Views > Lens to zoom a selected area only.
Other ‘Ease of Access’ options
As well as Narrator and Magnifier, there are other potentially useful options available on the Ease of Access page (press Windows + U to show this page).
- High contrast – choice of four high contrast themes.
- Keyboard options for those who have difficulty using a keyboard – including an on-screen keyboard and ‘sticky keys’ to enable shortcut keys to be pressed separately.
Accessibility Checker
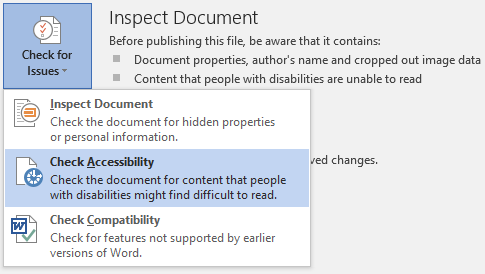
To ensure that you are creating documents that can be used by all your students, try using Microsoft’s Accessibility Checker. In Word, choose File > Check for Issues > Check Accessibility:

If any issues are found, you can click on an issue to see advice on how to fix it.
Anything else?
These are some of the features that we thought it would be useful to share, but there are others. If you have found anything else useful, why not add a comment to this post?


 Subscribe to Catherine Leyland's posts
Hi Catherine
Can you suggest the best method to share the information in this blog with our students on our Distance Learning Course?
Thanks
Liz
Hi Liz,
I’ve put the main points into a quick guide that I will send to you and to anyone else who is interested.